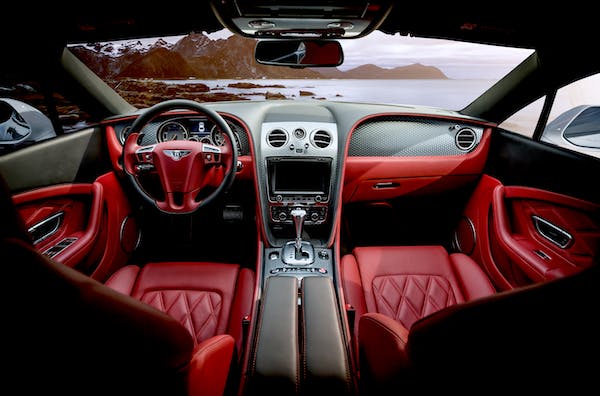
You should wash your car about once a month, and send it in for a more thorough detailing every few months. Or, you could try your hand at DIY interior car detailing.
Of course, you might consider DIY car detailing because it saves you money. A good detailing service can cost upwards of $100, after all. So, learning some tricks of the trade can keep your ride looking its best — and suit your budget, too.
Here is our car detailing DIY guide to help you get the job done.
1. Gather DIY Interior Car Detailing Supplies
Start the project by picking up the supplies you’ll need to detail the inside of your car. In most cases, you should have:
- Vacuum and brushes
- Microfiber cloths
- Spray cleaner
- Leather cleaner
- Carpet cleaner
Each one of these materials will come in handy while you clean. Read on to find out how.
2. Wipe Down the Surfaces
Start your detailing treatment by cleaning all of the hard surfaces inside of your car. So, you’ll hit the door handles, armrests, steering wheel, and dash with particular care, since those are areas that you touch often.
But don’t forget the rest of the hard surfaces inside of your car. Imagine you’re in charge of this exotic fleet of rental cars: what would you clean before handing the keys to another client? Any panels, handles, or facades should get spritzed with your all-purpose spray cleaner, then wiped down with your microfiber cloth.
3. Clean the Seats
Next up, you’ll focus on the seats in your car. If you have leather upholstery, cleaning it is a bit easier. You’ll spray on some leather cleaner, then wipe it down with another microfiber cloth.
If you have cloth upholstery, though, you’ll have to pick up a car-centric upholstery cleaner. In some cases, you may have to let it sit and dry before you can hop behind the wheel, so make sure your DIY detailing session happens on a day when you don’t have to drive a lot.
4. Vacuum and Clean the Carpets or Mats
Grab your vacuum and get to work — but only after removing the mats that cover your car’s carpets. You may want to hit your car’s seats, too. In fact, some DIY detailers will skip step 3 in favor of vacuuming their seats clean.
Once that’s done, remove dirt and debris from the floors with your vacuum, too. Then, use a carpet cleaner to get rid of any stains you may notice on the carpets.
Then, turn your focus to the mats you removed. If they’re fabric ones, you can vacuum them, too, and scrub them down to remove any stains or discoloration.
If your car has all-weather mats made of plastic, you can’t clean them with a vacuum. Instead, grab a hose and rinse them off, then leave them to the side to dry while you finish up the rest of your detailing work.
5. Grab the Glass Cleaner
Your last step should be cleaning the windows from the inside of your car. That way, you won’t be frustrated by any smudges that show up after you’ve wiped them down.
You already know how to do this. Grab a spray bottle of glass cleaner, spritz your windows, then use a dry cloth to wipe them to a streak-free shine. Voila.
6. Add an Air Freshener
If you want the total car detailing experience, then slip an air freshener into your car, too. That’ll ensure your vehicle smells as fresh as it looks — and you’ll get to enjoy that scent while you drive for weeks to come.
Learn DIY Protocol For the Exterior
If you want to complete the entire detailing project, you’ll want to hit the outside of your car, too. Grab a hose, some soap, a washing mitt, wheel cleaner, and that glass cleaner you used earlier.
You’ll start by rinsing down the exterior of your car to remove any stuck-on dirt and debris. Then, rinse off your wheels and spray them down with wheel cleaner. If your hubcaps are covered in brake dust, you’ll have to scrub them down before rinsing them to a shine.
Next, fill two buckets with water, and add soap to one of them. Dip your mitt into the soap, then start scrubbing from the top of your car. Clean off your mitt in the water bucket before re-dipping it in the soap.
Once you’ve made your way from the top to the bottom of your car, it’s time to rinse the whole thing down. You should rinse soap as you go — you don’t want it to get crusted onto your car’s exterior — but the final rinse will remove any lingering residue.
Then, it’s time to dry your car’s exterior. You’ll need more microfiber cloths to make this a streak-free job. If you want, you can follow up on this task with a final step: waxing your vehicle.
Of course, this is an optional final step. It takes a while — you have to buff small sections of your car, then wipe away any excess with your microfiber cloth.
Start Your Car Detailing Project
With these steps in mind, you can easily take on your DIY interior car detailing project. And, if you’re feeling extra ambitious, you can tack on the exterior detailing steps listed above, too.
Altogether, these to-dos make up our car detailing DIY guide, which will help you restore your car to a shine. Need more car-related advice? Don’t forget to check back with us for more.

