As a car owner, there’s nothing quite as frustrating as getting a flat tire while you’re on the road. A punctured tire can be caused by a variety of things, from a nail on the road to a sharp object that you accidentally drove over. No matter the cause, a flat tire can be a major inconvenience that can ruin your day.
If you’ve ever found yourself with a punctured tire, you know how frustrating it can be. Whether it’s a slow leak or a complete blowout, a flat tire can derail your plans. Fortunately, with the right tools and know-how, you can repair a punctured tire and get back on the road in no time. In this post, we’ll walk you through the steps for how to repair a punctured tire.
Fortunately, repairing a punctured tire is a relatively easy process if you know what you’re doing. With the right tools and some basic knowledge, you can quickly repair a punctured tire and get back on the road in no time. Knowing how to repair a punctured tire can save you time and money, and help you avoid getting stranded on the side of the road.
In this post, we’ll walk you through the steps for how to repair a punctured tire. We’ll cover everything from assessing the damage to repairing the puncture and reinstalling the tire. By the end of this post, you’ll have a better understanding of how to handle a punctured tire and be better prepared for any unexpected road emergencies.
How-To: Tire Repair
So, let’s get started with the basics of tire repair.
Step 1: Assess the Damage
The first step in repairing a punctured tire is to assess the damage. If you notice a nail or other sharp object sticking out of the tire, do not remove it. The object may be plugging the hole, and removing it could cause a sudden loss of air pressure. Instead, use a tire pressure gauge to check the pressure in the tire. If the pressure is low, add air and listen for any hissing sounds that may indicate a leak. If you can’t locate the leak, you can use a soapy water solution to find it. Apply the solution to the tire and look for bubbles forming where air is escaping.
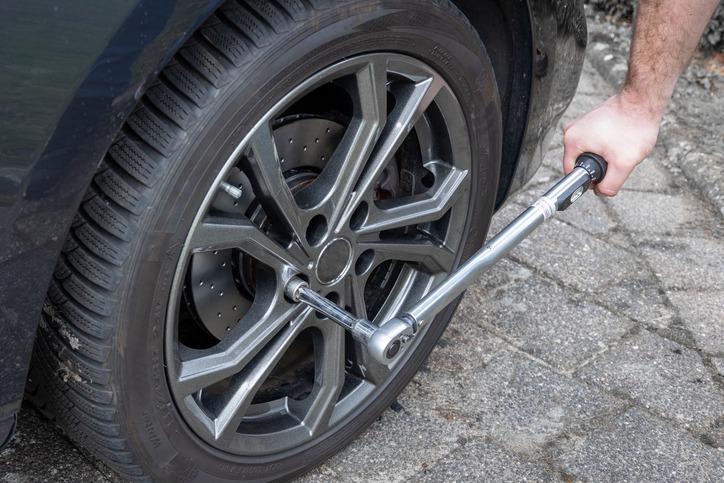
Step 2: Remove the Tire
Once you’ve located the puncture, it’s time to remove the tire from the wheel. Use a lug wrench to loosen the lug nuts and then jack up the car so that the tire is off the ground. Remove the lug nuts and then gently remove the tire from the wheel.
Step 3: Repair the Puncture
With the tire removed, it’s time to repair the puncture. There are several methods for repairing a punctured tire, but one of the most common is using a tire repair kit. These kits come with a plug that can be inserted into the puncture to seal it. Start by using a tire rasp to rough up the inside of the puncture. Then insert the plug into the puncture using a plug insertion tool. Trim any excess plug material flush with the tire tread.
Step 4: Reinstall the Tire
With the puncture repaired, it’s time to reinstall the tire. Start by lining up the rim with the wheel studs and then hand-tighten the lug nuts. Use the lug wrench to tighten the lug nuts in a star pattern until they are snug. Lower the car back down to the ground and then use the lug wrench to tighten the lug nuts to the manufacturer’s recommended torque specification.
Step 5: Check the Tire
After you’ve reinstalled the tire, it’s important to check it again for leaks. Use a tire pressure gauge to check the pressure and listen for any hissing sounds that may indicate a leak. If the pressure is holding steady, you’re good to go.
Save Your Own Day
Knowing how to repair a punctured tire can save you time and money, and help you avoid getting stranded on the side of the road. Remember to always check your tires regularly for damage and to keep a tire repair kit in your car for emergencies. With a little bit of practice and the right tools, you can be back on the road in no time.
In conclusion, knowing how to repair a punctured tire is an essential skill for any car owner. A punctured tire can happen at any time, and being able to repair it yourself can save you time and money, and help you avoid being stranded on the side of the road. While there are many methods for repairing a punctured tire, using a tire repair kit is one of the easiest and most effective methods.
Remember to always check your tires regularly for damage and to keep a tire repair kit in your car for emergencies. Additionally, it’s important to know when a tire is beyond repair and needs to be replaced. If the puncture is too large or in the sidewall of the tire, it’s not safe to repair and the tire should be replaced.
With the steps outlined in this post, you now have a better understanding of how to repair a punctured tire. By following these steps, you can quickly and safely repair a punctured tire and get back on the road. Remember to take your time and be patient, and don’t hesitate to seek professional help if you’re unsure about the repair process.
In the end, being prepared for unexpected road emergencies can make all the difference. Stay safe and happy driving!