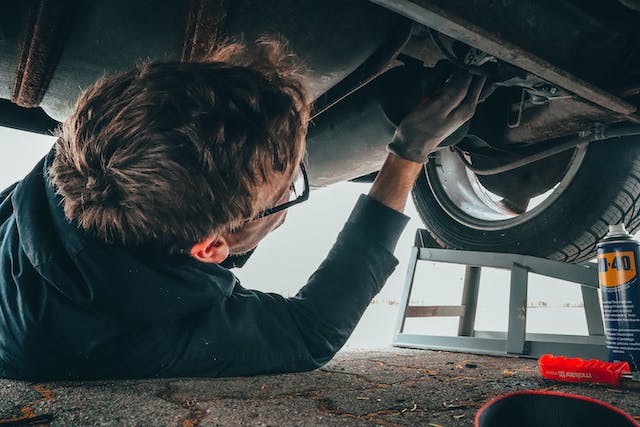
Not every automotive fix requires the trained hand of a mechanic. Here are examples of DIY car repairs you can handle on your own.
Tired of spending so much money on car repair? Do it yourself!
A lot of DIY car repair tasks are easier than you may think. And it saves you 100% of your car repair labor costs. All you have to pay for are the parts!
And many of the DIY auto repair tasks listed below require no tools and take only minutes to complete.
So, then, stop overspending and start training. Read on to learn these simple tricks of the auto repair trade.
1. Changing Broken Wiper Blades
When the rainy season starts, worn-out, broken, useless wiper blades are a repair job you can’t afford to put off. But that doesn’t mean you need to pay someone $20 to replace them. Instead, replace them yourself for as little as $5 per blade.
Any store that sells wiper blades should have a manual right next to them that tells you what blade types and sizes you need.
Changing the Blades
The first step is to lift the wiper arm away from your windshield. Don’t let it snap back in place or it may crack your windshield. When the arm is extended all the way out, it should rest in place.
Most cars use pin-type arms or hook slot connectors to attach the blade to the arms. To remove these, either pull the pin and slide the blade out or simply slide it out of the connecting hooks. Other cars require you to unscrew the blades.
If you can’t tell which type yours is, refer to your user manual. You can also search for and download car repair manuals online.
To install the new blade, reconnect it the same way you disconnected it. The packaging on the wiper blades should have a diagram to help in case you forgot.
2. Fixing Scratched Paint
If your car still has its factory-issued paint job, touching up scratched paint is a snap! Like wiper blades, touchup paint is usually sold alongside a manual. To choose matching touchup paint, look up your car’s factory-issued paint color in this manual.
Next, clean the scratch thoroughly. If the paint requires a primer (this information should be on the product’s packaging) apply the primer and then the touchup paint.
Allow the paint to dry for a full day. Then, very slowly and carefully, wet-sand the repainted scratch with 600-grit or 1000-grit sandpaper. Do this until the area is fully smoothed out and even.
Apply a gloss compound over the area and repeat until the scratch is gone completely. Don’t wax the car for 30 days afterward.
3. Fix Low Tire Pressure
Did that dang low tire pressure light come on again? Don’t ignore it. When you drive with low tire pressure, both your tires and your gas will be consumed more quickly.
Instead, spend a dollar. That’s right, one dollar. That’s all it costs you to purchase a simple tire gauge from the dollar store.
Now, open your driver’s side door. Somewhere in the doorframe area should be a label that lists the appropriate tire pressure for your vehicle’s tires. If you can’t find this label, check your user’s manual.
Next, unscrew the air caps from your tires, insert the gauge firmly, and hold it there. This will tell you the exact tire pressure so you’ll know which tire or tires have low pressure.
While you’re down there, check for nails, glass, or other tire punctures. If you have a flat, put on the spare and get a replacement.
To inflate the tires, you can find an air pump at almost any gas station. Some are free, some ask for quarters. Use the pump to inflate the tires, periodically checking them with the gauge, until the pressure level is correct.
4. Jump-Starting A Dead Battery
First of all, if you don’t have any jumper cables, pick some up today. You should always have jumper cables in your car for yourself and anyone else who needs them.
Then, if your battery dies, call a friend for help or flag down a nearby good Samaritan. Open the hoods of both cars and locate the batteries. If you have safety gloves, put them on.
Connecting the Cables
Connect the first red clamp to the positive terminal of your dead battery. Connect the other red clamp to the positive terminal on the working battery.
Now, connect one black clamp to the negative terminal of the working battery. Connect the other black clamp to “grounded metal” (any shiny metal under the hood, like a nut or bolt.)
Do not connect a clamp to the negative terminal on the dead battery. That would be an unsafe ball of fire waiting to happen.
Start the working car and let the engine run for a few minutes. Try to start up the dead car.
If it doesn’t work, check your connections and try again. If it still doesn’t work, you’ll need to call a tow truck.
Lastly, drive/get towed to the store and get a new battery immediately.
5. Changing a Dead Battery
Put on gloves and safety goggles. Pop the hood, find the battery.
Disconnect the cable from the negative terminal. You may need a wrench to loosen it. Set the cable carefully and securely aside. Don’t let it touch any other metal.
In the same way, disconnect the positive terminal cable and set it aside.
Some manner of straps, nuts, and/or other fasteners are securing the battery in place. Remove all these fasteners, referring to your user’s manual if necessary.
Lift the battery and place it in a plastic garbage bag. Double-bag it, just in case it leaks.
Before installing the new battery, use sandpaper to clean any corrosion off the battery cables. Do not reconnect the cables until they’re completely shiny.
Follow these steps in reverse order to install the new battery. Set the battery in place, strap it in, connect and tighten the positive cable first, followed by the negative.
Finally, dispose of the old battery. This can typically be done anywhere new car batteries are sold.
Remember This DIY Car Repair Guide
Knowledge is power. Next time you need a jump, a new battery, or a touchup, you know what to do. You now have the training you need to get your hands dirty and save money.
Remember these DIY car repair tips and go try them for yourself.
Better yet, we have more where these came from. Check out more invaluable, money-saving tips on our Car Maintenance Blog.